Managing products
Create and configure products to monetize your directory
Overview
Products define what users pay for and how much they pay. There are two product types:
- Paid Listing - Charge users for listings, with three modes: pay to list, pay to feature, or pay to list with featured option
- Paid Account - Charge for account access
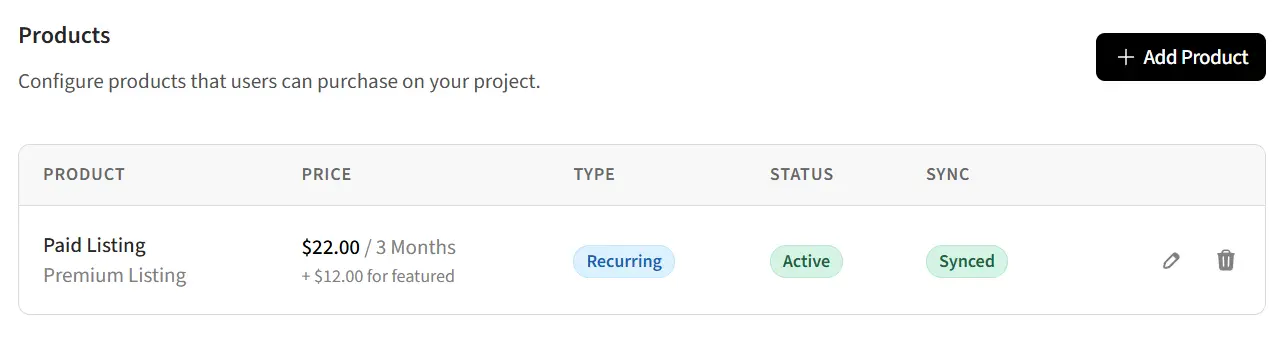
Accessing the products page
- Open the edit page of your directory
- Click
Settingsin the menu bar - Select
Monetization, then clickProducts
Product types explained
Paid Listing
Charge users for listings. This product type has three modes:
- Pay to list - Charge users to submit a listing (learn more)
- Pay to feature - Charge users to feature their listing (learn more)
- Pay to list with featured option - Charge for submission with an optional featured add-on (learn more)
Paid Account
Requires payment for account access. Users must pay after registering before they can access the directory.
- Payment required after email verification
- Works with both forced and optional registration modes
- Can be used in conjunction with paid listings
Pricing types
Each product can be configured as either one-time or subscription-based:
One-time payment
- User pays once
- Access or feature is permanent (for listings) or until manually revoked
- No recurring charges
Subscription
- User pays on a recurring schedule
- Available intervals: 3 months or 12 months
- Automatic renewal until cancelled
- Access or feature is removed when subscription ends
Creating a product
- Click the
Add Productbutton - Select the Product type
- Enter a Name (displayed to users during checkout)
- Optionally add a Description
- Select the Pricing type (one-time or subscription)
- If subscription, select the Interval (3 months or 12 months)
- Enter the Price
- For Paid Listing with "Both" mode, optionally enter the Featured add-on price
- Click
Save
Syncing products
After creating a product, it must be synced to your payment provider (Stripe or PayPal) before it can be used for checkout.
Sync status
The products list shows sync status for each product:
- Synced - Product exists in payment provider and is ready for use
- Not synced - Product needs to be synced before use
Syncing individual products
- Find the product in the list
- Click the
Syncbutton in the actions column - The product will be created in your payment provider
Syncing all products
Use the Sync All button to sync all unsynced products at once. This is especially useful after switching payment providers. This only shows when products are available to sync.
Editing products
- Click the edit button for the product you want to modify
- Update the name, description, or price as needed
- Click
Save - Price changes are automatically synced to your payment provider
Deleting products
- Click the delete button for the product
- Confirm the deletion when prompted
- The product is removed from your directory and archived in the payment provider
Related guides
- Monetization settings - Configure payment providers
- Paid submission mode - Charge for listing submissions
- Featured placement mode - Charge for featured placement
- Both modes combined - Paid submission with featured add-on
- Paid accounts - Charge for account access
- Viewing payments - Track payments and subscriptions